
Make a Better Mask! Free pattern, tutorial and a link to the BEST elastic.
I was never planning to write a mask tutorial because everyone has already done it. BUT, I have seriously struggled with the mask wearing, y’all. I have some weird sensory issues around clothing and cannot not think about something if it’s causing me physical discomfort, no matter how small. Thus, when I wear an uncomfortable face mask, I can’t stop thinking about how uncomfortable it’s making me and as a result, I am CONSTANTLY touching my face to adjust the dang thing. LOL. One time my daughter counted how many times I complained about my mask at the grocery store, ha! I’m such a child about it.
But, masks are mandated in my state and I was beyond over the issues I was having, so I set out to find the perfect elastic and the perfect style. I’ve seriously tried them all and I’ve found the magic mix. So, enjoy this free pattern and tutorial, but whatever you do, BUY THE RIGHT ELASTIC. But more on that in a minute.
Update: This pattern is sized to fit most women, but I have added a separate post on how to easily alter this pattern for men, children, or any size face. You can find that right here.
This post may contain affiliate links, which means that while I am not paid to promote certain items, I will earn a small commission should you purchase items through these links. For more info, see my disclosure policy.
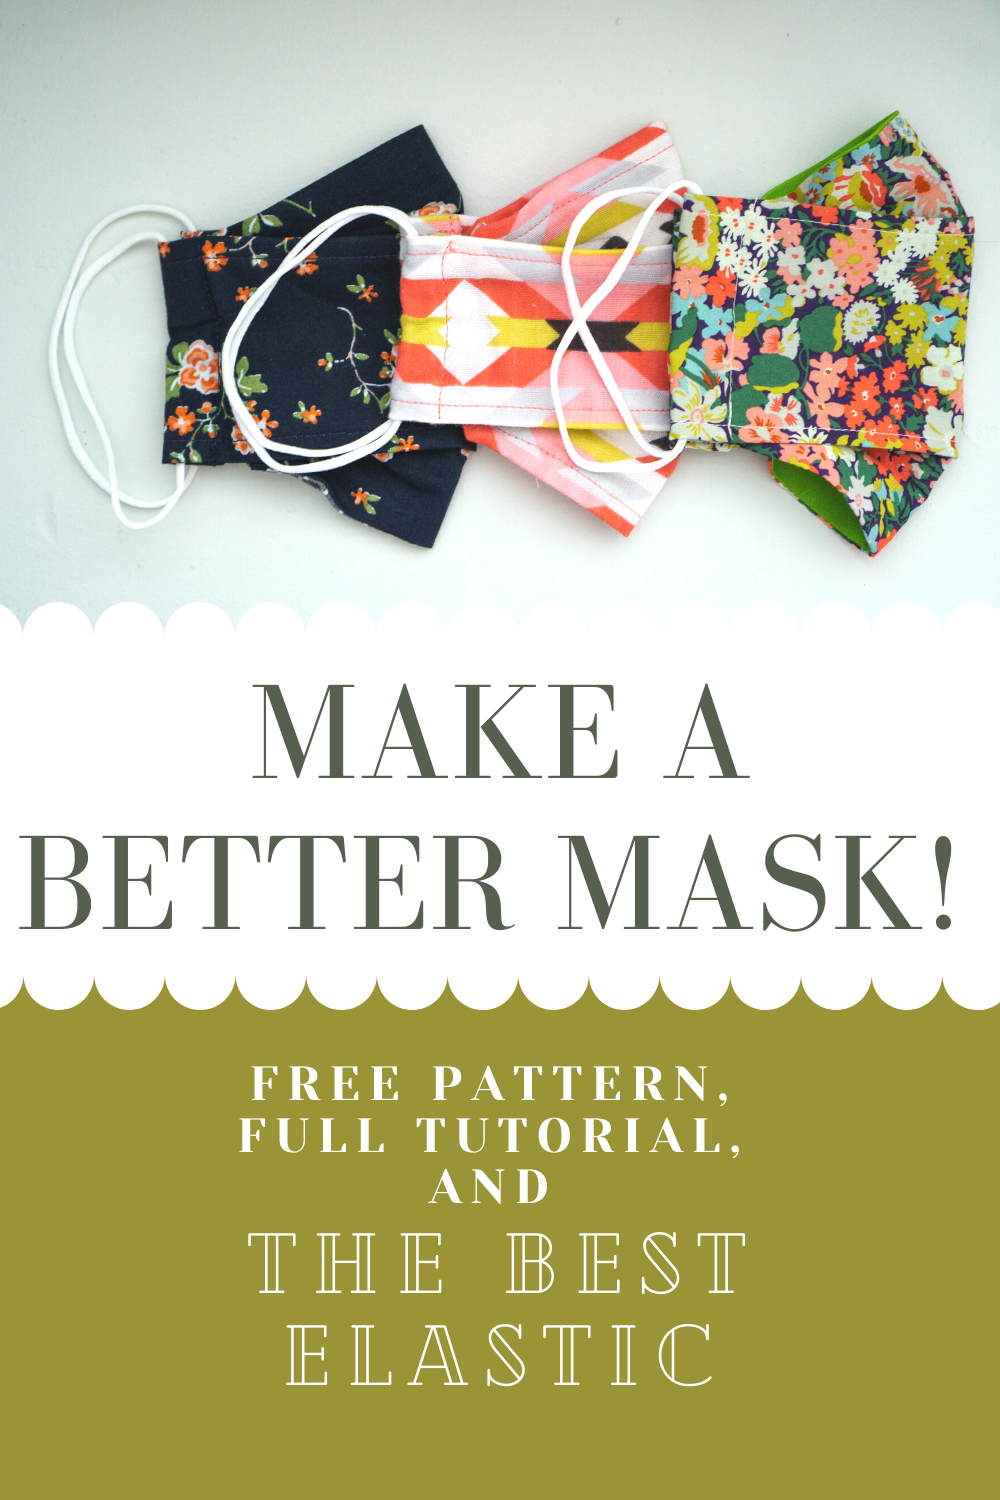
Here’s why this mask style is my favorite. The origami pleats make it fit my face in a way that makes it sort of stand away from my nose and mouth. So every time I breathe deeply, I’m not sucking the masks into my mouth. It gives me extra room for my nose and it stays put even when I’m talking, which was a problem with the pleated style. The contour style of mask, with the seam down the front, always got pulled down by my chin when I talked.
AND, this style is much easier to sew! No more fussy pleats! And no sewing tiny ends of elastic either. These masks only have a few seams and are easier on the machine than all the thicknesses of the other styles.
You’ll need:
Scraps of cotton woven fabric. Cotton is the most breathable. Knit fabrics don’t work well for this style of mask. I make two layer masks for myself, but you can add a third layer if you want, just layer it under your top fabric and treat the two as one.
Elastic. I’ve made masks with all kinds of elastic at this point, but I finally ordered the right stuff and it makes all the difference! This elastic comes in giant quantities (share with your friends!), and is not expensive at all. It’s super soft and does not bother my ears, which is one of my biggest complaints! I ordered the 1/8” size.
You also need the pattern, of course! Go here to download it, or right click the image below to save and then print. Make sure you print it at 100%. If your printer is set to “set to scale” or some other setting, it might print out too small. When printed, the rectangle should measure 7” x 10”, taking up most of the sheet of paper.
If you cannot print the pattern, just create your own pattern by cutting a rectangle measuring 7" x 10". The for the corners, make a mark 2" from each corner on every edge. Then connect those marks and cut off those corners.

Instructions:
First, cut your mask pieces out and sew them right sides together using 1/4” seam, leaving an opening for turning at one small end. Those two pins in the photo below mark the space I’m leaving open.

Next, clip your corners close to your stitching so they’ll be neater when you turn them right side out. Then turn the piece through the opening you left and iron it flat. A chopstick or turning tool helps get those corners and edge nice and sharp. Press the opening closed as if you had sewn it. It will get sewn shut in the final step.

Here comes the origami part. With your mask placed down so that the inside fabric is facing you, fold the long edges in towards each other at 2”. These are the dotted lines on your pattern.

Sewing along those folded edges at a scant 1/4”, creating a pin tuck of sorts.

Next, you’re going to lay it back down and fold the long edges up to meet the top edges. Don’t sew them down, though.

Now, to make the casing for the elastic, fold the short ends in 3/4”.
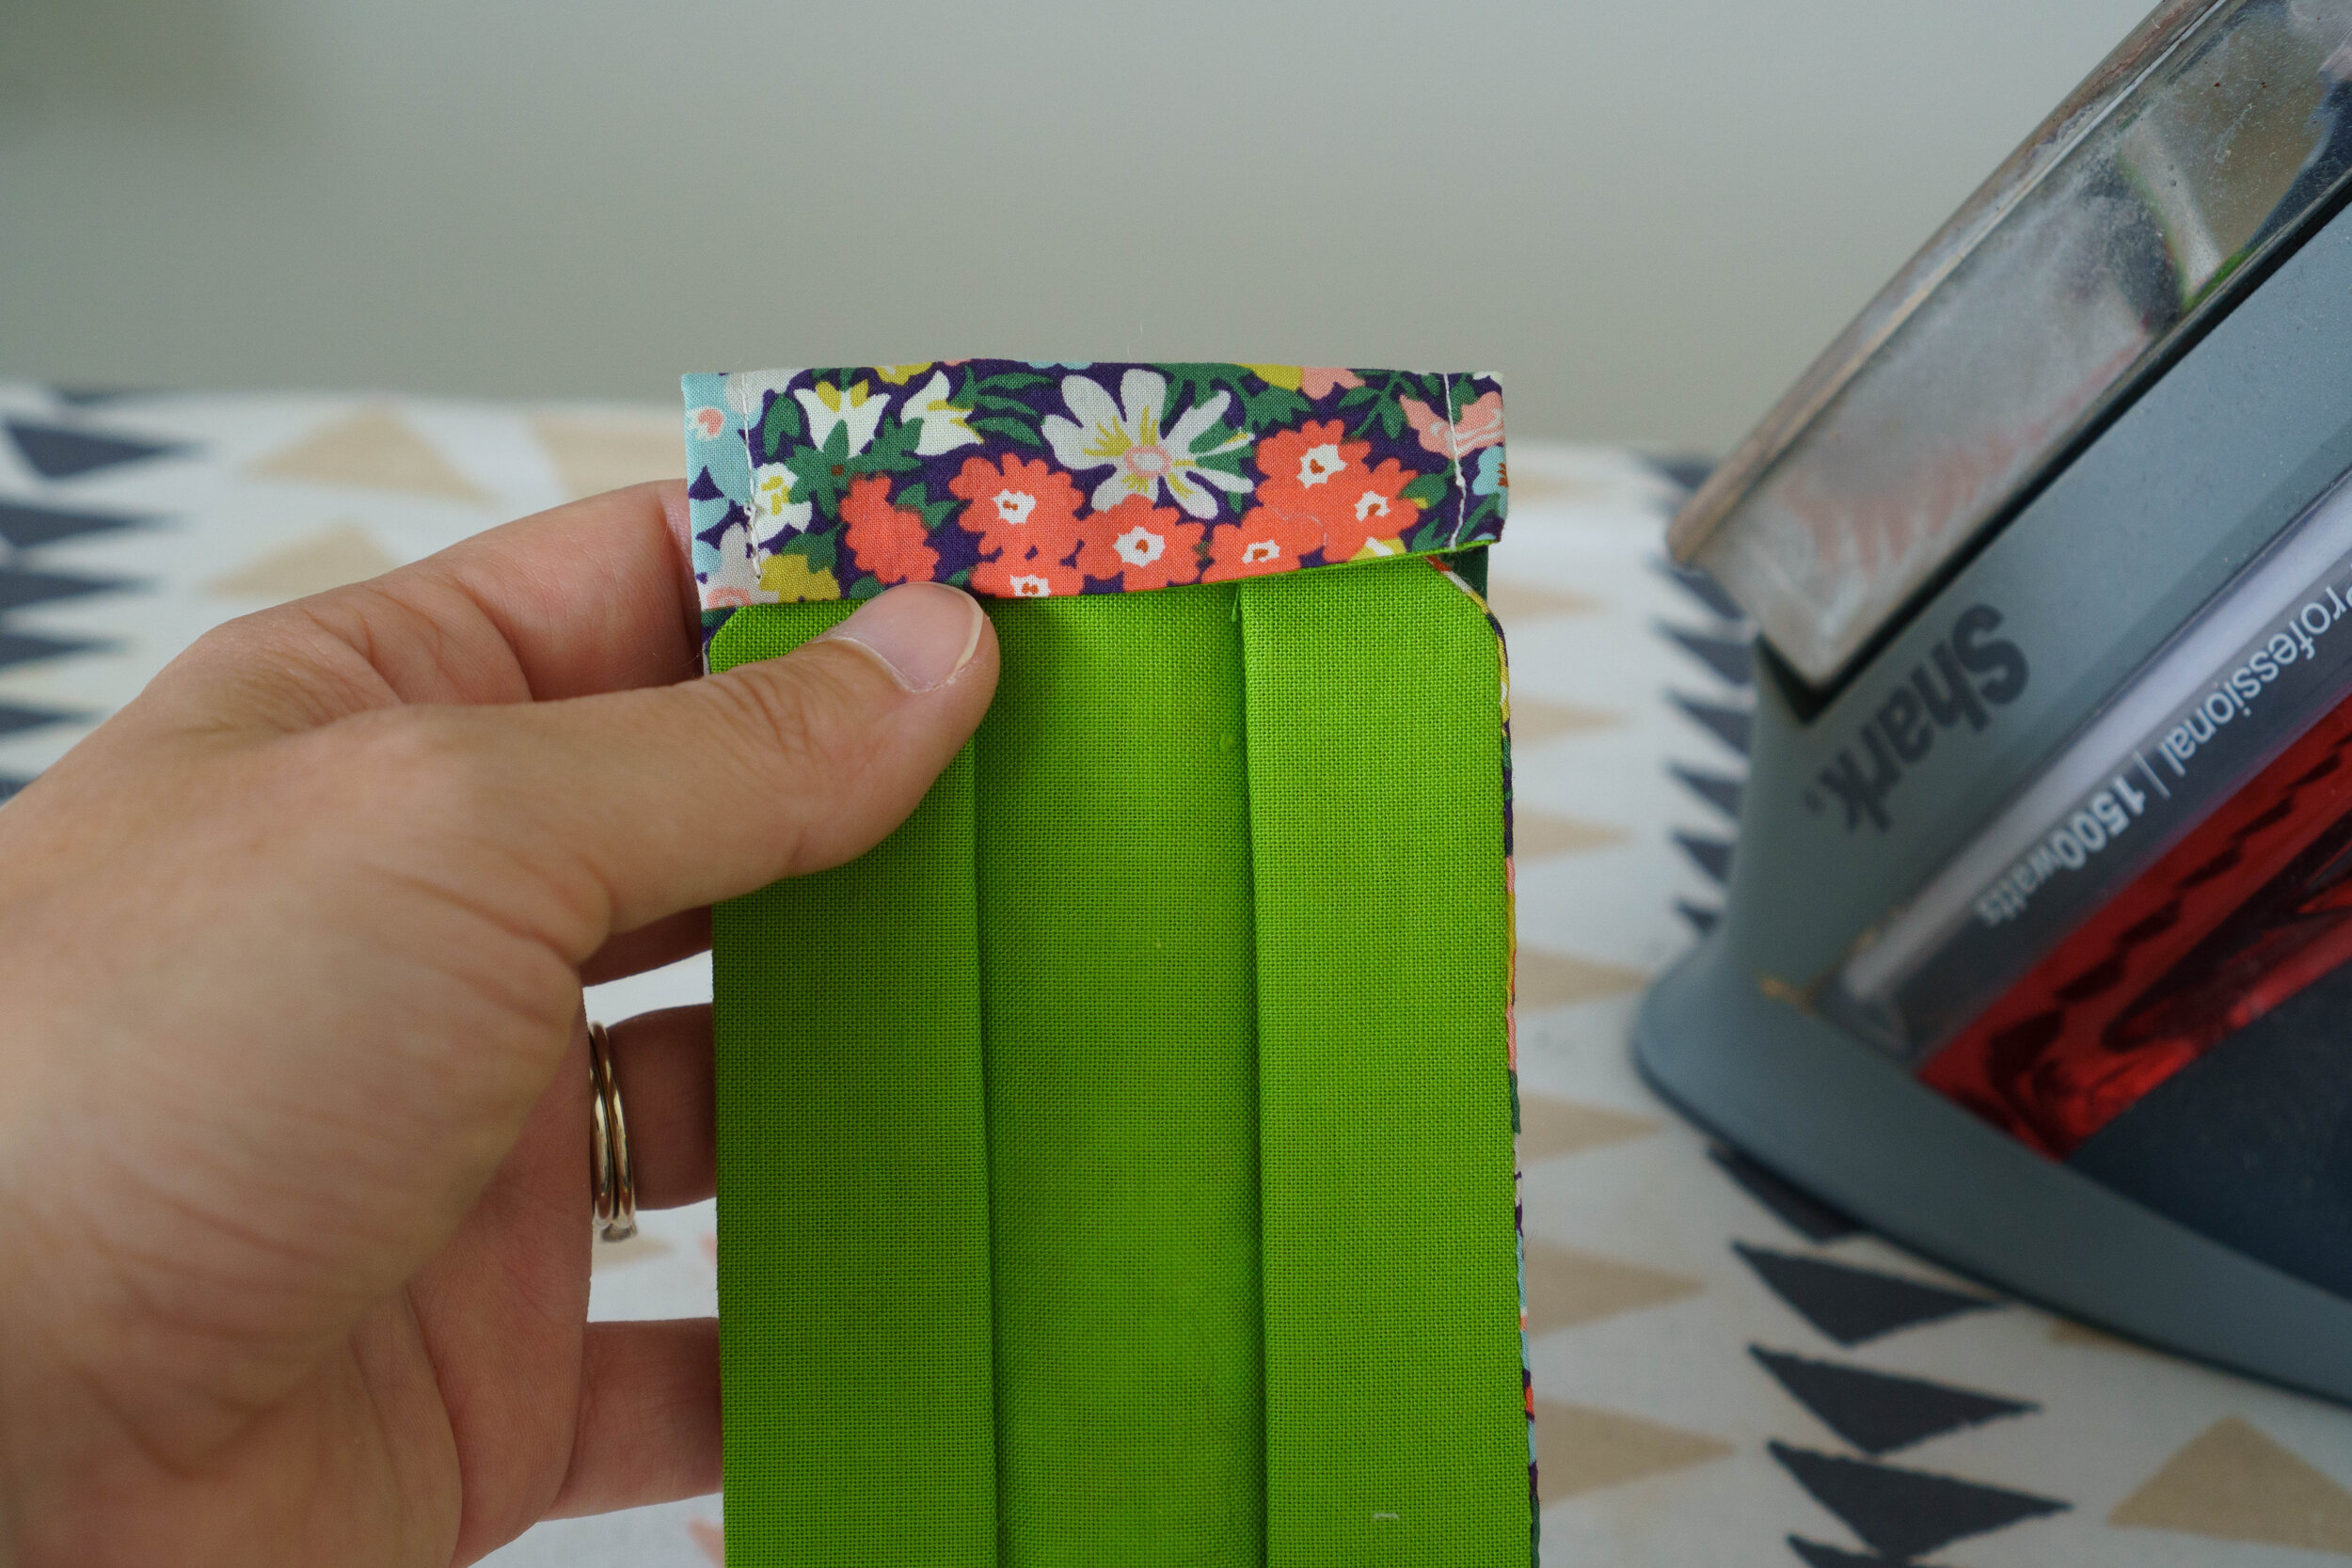
Before you sew the casing closed, cut two pieces of elastic, each 11” long. Lay them inside your casing and stitch it closed close the edge, making sure not to sew over the elastic.

Now your mask should look like this (this is the inside):

Tie the elastic and try it on to adjust. I tie mine loosely in a know and then try it on before pulling it tight. Then I snip the ends and pull the knot inside the casing, just so it looks nicer. The added benefit of this mask style is that the elastic is very easy to replace if it breaks, unlike the pleated kind I had been making before.
To wear the mask, pull the narrow flaps out and over your nose and chin. I store my masks by folding them in half with those flaps out so that they naturally open up and it’s less fussy to put on.

I’ve already made five of these, three for me and a couple for my kids. I love the Star Wars one I made my son! These masks are MUCH faster to sew than the others I’ve made.

Just for grins, you can see how much elastic I have now, haha! It’s so much. I hung it up so it wouldn’t get tangled, but It’s really inevitable at some point. Maybe I’ll ball it up like yarn.

If you use this mask pattern, let me know! Tag me on Instagram @pincutsew, I’d love to see. It’s my absolute favorite to receive messages and tags with what others have made with my patterns and tutorials, it really makes my day. And if you’re looking for more sewing tutorials, check out my tutorials page.
Cheers!
Nikki


8 great sewing ideas for baby gifts, with video tutorials and pdf patterns for every one!