How to Assemble PDF Sewing Patterns (Without Losing Your Mind).
If you avoid PDF patterns like the plague, it’s probably because you think they’re a pain in the rear to assemble. I totally get it, it can be super annoying when things don’t seem to line up, when you’re trimming edges off a ton of pages, when the test square doesn’t measure what it’s supposed to and you already printed the entire thing. Eek! I for sure understand why you choose not to put yourself through it.
BUT, I’m here today to argue that there is an easy way to assemble PDF patterns! There are a few tricks to know, but I can put together a PDF pattern in 10 or 15 minutes from the time I hit print to the time I’m cutting out my garment. I’ll tell you a few secrets that will hopefully make you want to give PDF patterns another try.
This post may contain affiliate links, which means that while I am not paid to promote certain items, I will earn a small commission should you purchase items through these links. For more info, see my disclosure policy.
If you’ve been reading here for any length of time, you’ll know I use a lot of print pattern from the Big 4 pattern companies, but in recent years I’ve branched out to more PDF patterns. While I’ve only used a handful of companies, I’ve only ever had one experience with a pattern just not lining up at all how it was supposed to. It was a long time ago and I don’t even remember the pattern company. I think when PDF patterns first became a thing, this was more common, but now companies seem to have it figured out and I haven’t encountered this at all in several years now.
My experience with PDF patterns comes mostly from Seamwork and Jalie, but I’ve used other Indie pattern companies too, such as Pattern Scout, True Bias, Helen’s Closet, and Make It Perfect.
Here are my tips for how to get a PDF pattern assembled quickly and with no drama:
First …
Make sure you print the pattern at 100% scale! For some reason, Seamwork always wants to print at 106%. It’s weird and I’ve wasted a lot of paper forgetting to quickly check before I hit print. It’s worth printing that first page by itself just to make sure the test square measure correctly.
Second …
Use a paper trimmer. If you only have the Fiskars one from your scrapbooking days, that works too, but I have one of the long arm teacher kind, eerily called a guillotine paper trimmer, and it works awesome for this! It’s worth purchasing one of these if you’re a frequent PDF pattern user (or a homeschooler) and they’re much less expensive than you’d think. They actually cost the same as the scrapbooking kind.
Now, you don’t need to trim every side of every sheet! Assuming your printer prints straight (if it doesn’t I recommend replacing your printer! Life is too short to deal with printer annoyances. I’ve loved my Canon for many years now) … anyway … you only need to trim off two sides in order to assemble the pattern. Just make sure it’s the same two sides on every sheet. I use my trimmer to cut several sheets at once, cutting off first the right side, then the bottom edge of every sheet, right on the line. I put them aside, upside down, then do the next several sheets. Keep them all in order as you go! Of course, some patterns are made so you don’t have to cut them at all, which is nice. This is the case with the Lulu cardigan I just made and that was a nice surprise.
Third …
Get a proper tape dispenser. It’s cheap and you will fly through the taping process more accurately when you don’t have to use both hands to get each piece of tape. I keep refills in my sewing room. Use a lot of tape as you start taping them together. Because you only cut off two edges, it’s very easy to align the pages as you go.
Fourth …
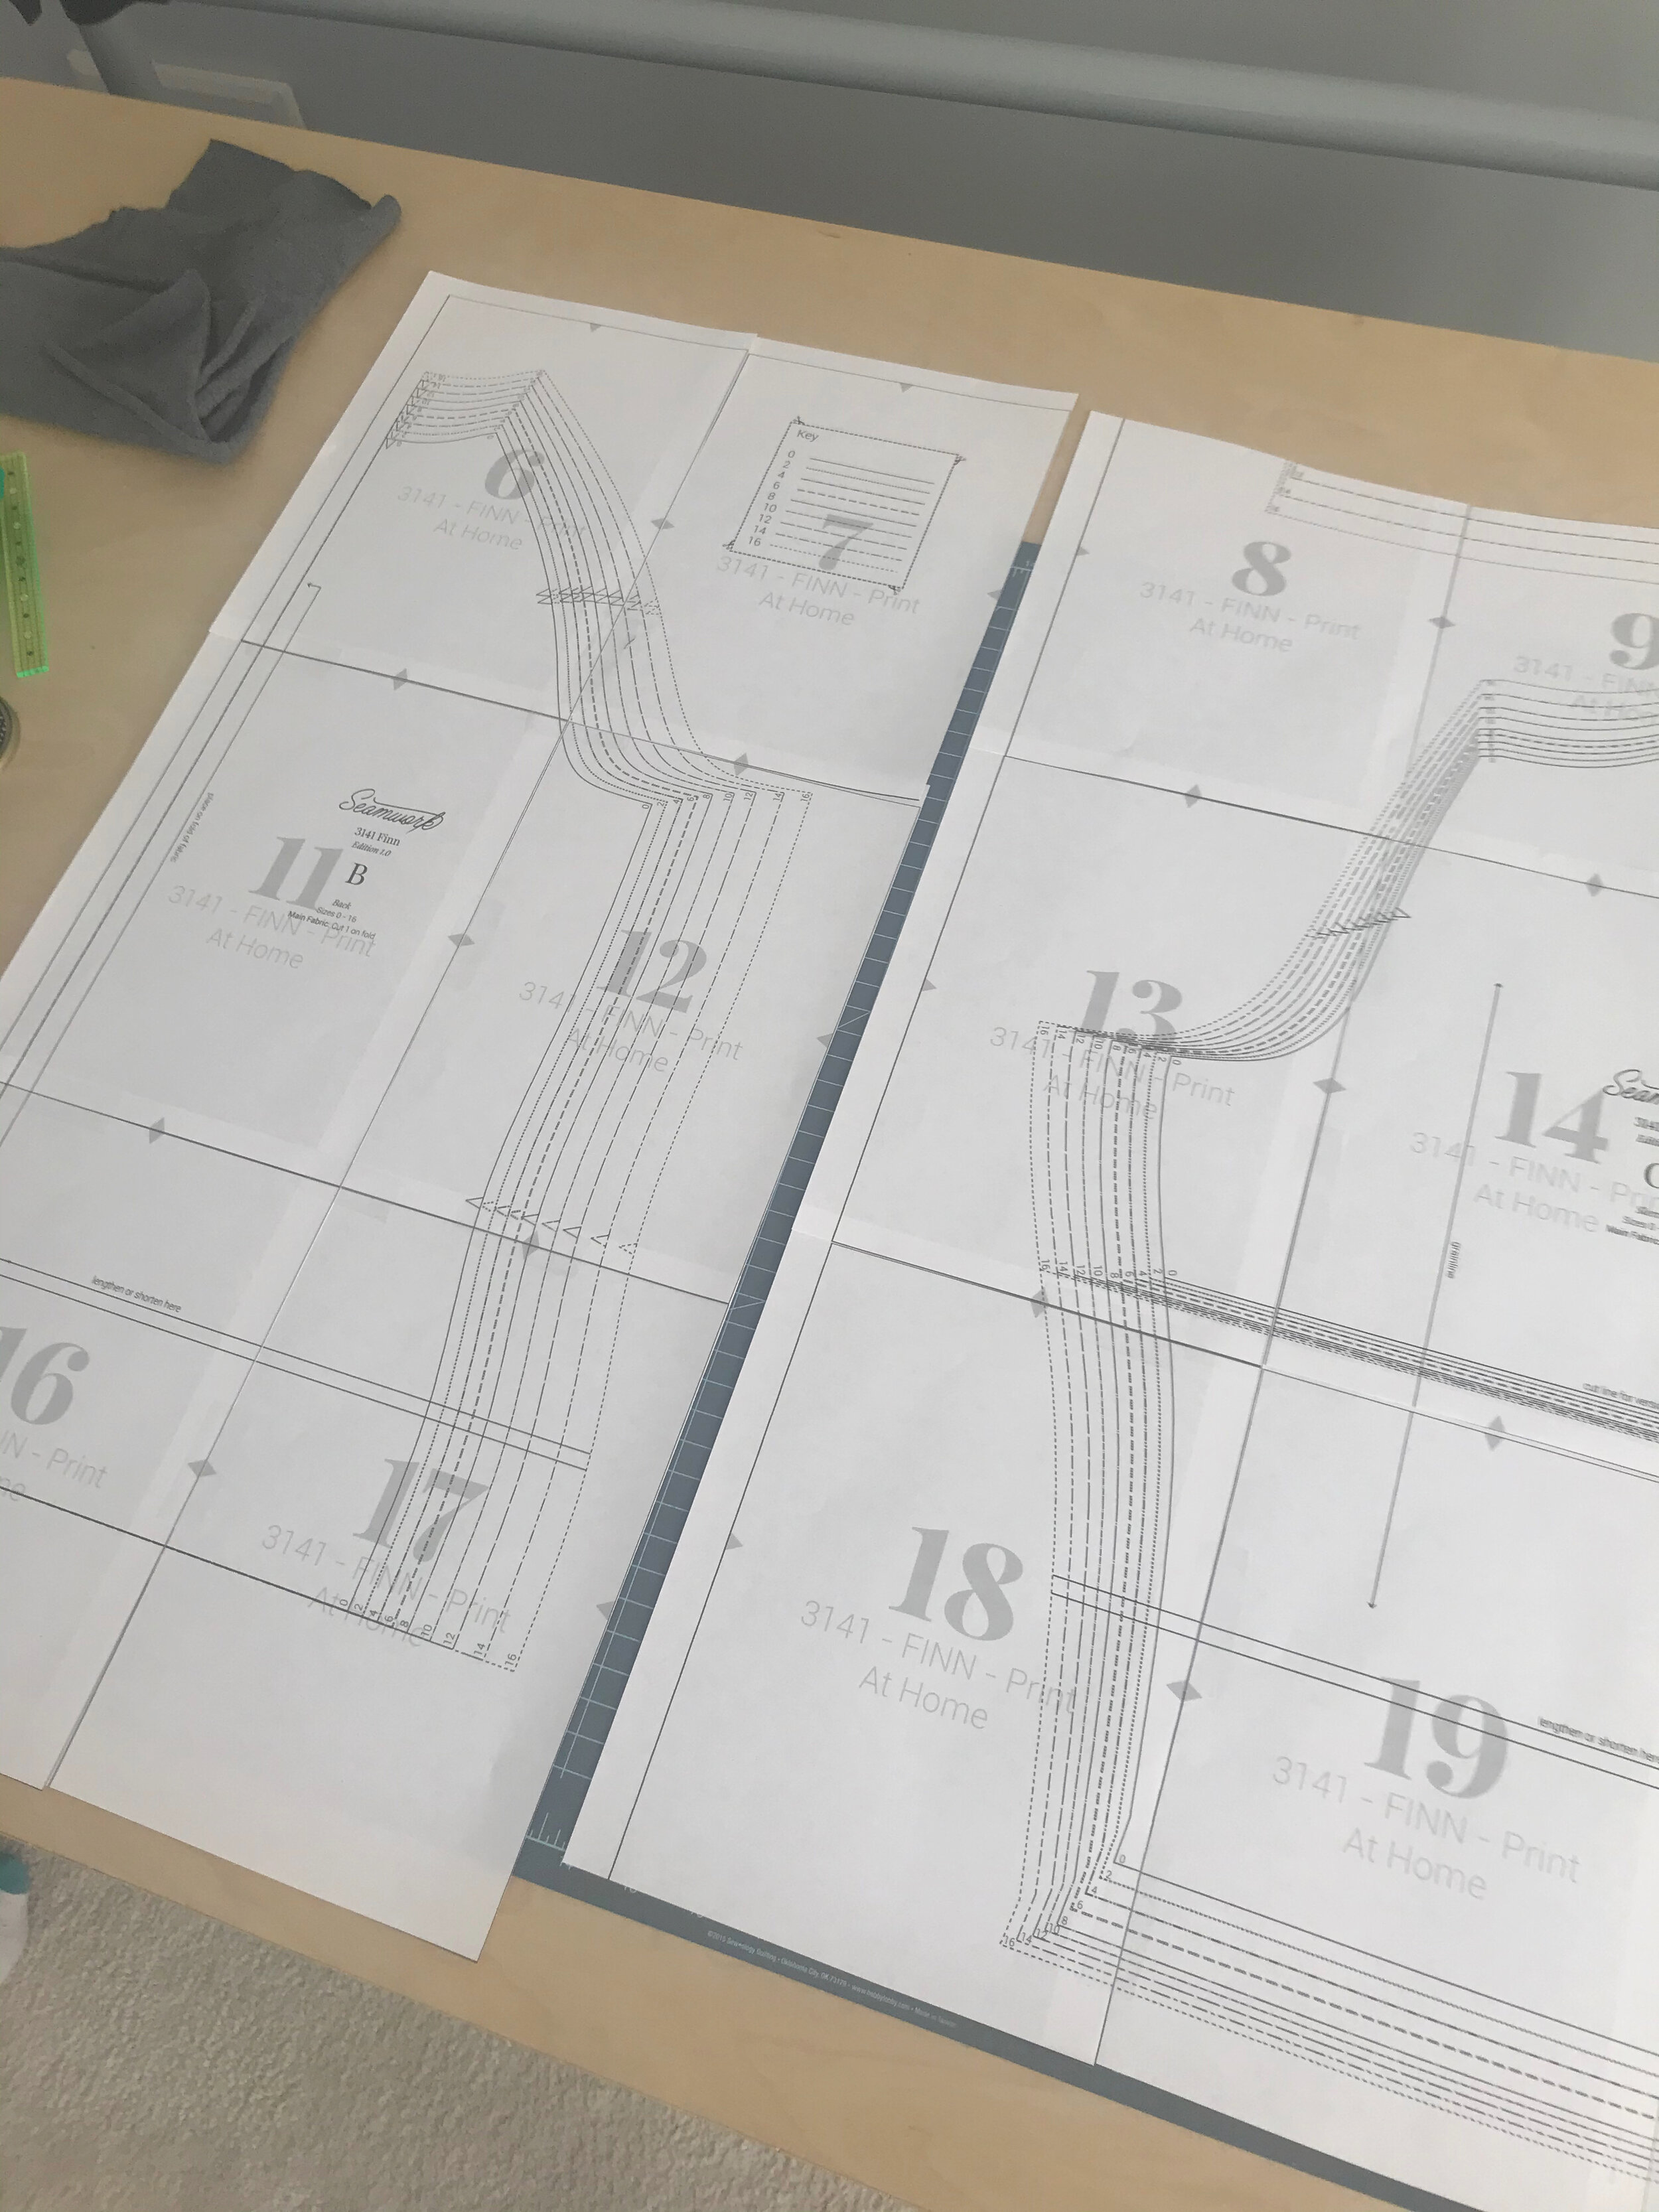
This is probably the biggest revelation for most people: You do not need to tape the entire giant grid together before cutting out the pieces. Tape enough pieces together to have a pattern piece or two complete and then cut that piece out (see the next tip), before moving on down the grid. Revolutionary, I know, haha. This method is more accurate because the more papers you’re taping together, the more likely they are to start to get wonky and cause frustration by not matching up.
You can see in the photo below, I didn’t bother taping the sheets together where it was clearly unnecessary.
Fifth …
Cut out the pieces with a rotary cutter. If you are using scissors, you will be there all day. Get your rotary cutter out and start slicing. It’s super accurate and goes SO MUCH FASTER. If you need to, highlight your size before you start cutting if the lines are hard to track. I rarely do this, but have needed to a couple times. Of course, you’ll need a large cutting mat for your cutting surface.
Sixth …
Use pattern weights instead of pins when you’re ready to cut your fabric. The paper can be hard to pin through, though impossible, so I keep pattern weights handy. Again, I use the rotary cutter to do all my cutting. I’m a big fan of the rotary cutter! It took me a long time to try it because I was scared I wouldn’t be able to be accurate, but after trying it once, I never went back.
There you have it. If you’ve tried PDF patterns before and swore them off for good, I hope you’ll give them another try! Especially since Covid, when shopping just became harder in every way, I’ve been so thankful for the availability of PDF patterns. If you aren’t sure where to start, I highly recommend a subscription to Seamwork. (I’m not an affiliate, I’ve just had a great experience). You get two pattern credits every month and the offerings are always so great! This month they have one for a coat I’ve been trying to find a pattern for ever since I saw one like it on a TV show last year (or this year? Lol, longest year ever).
Cheers!
Nikki


8 great sewing ideas for baby gifts, with video tutorials and pdf patterns for every one!