How to Make Pin Cushions with Mason Jars || And Easy & FREE Tutorial
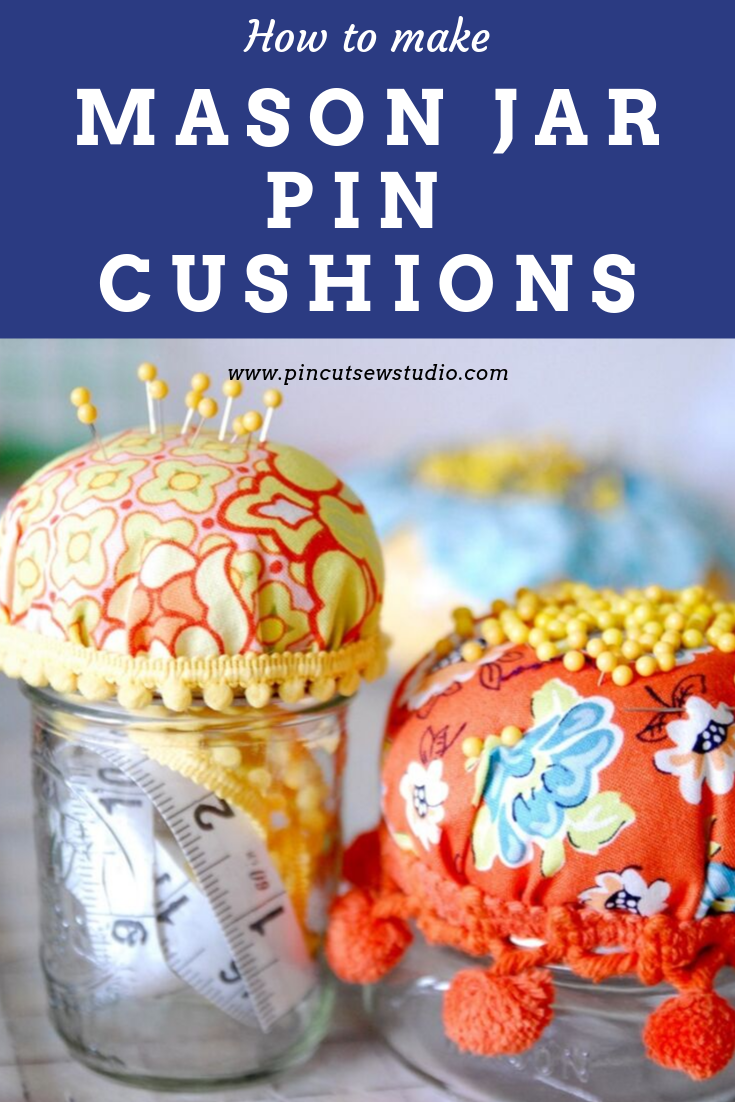
I found myself needed a few more pin cushions for sewing classes and decided to try making some with a few mason jars I had in the cupboard already. The fun thing about making pin cushions out of jars is that they can hold sewing accessories safely in the jar portion and become a travel sewing kit!
Today I’ll show you how to make an easy pin cushion out of any size jar, and you don’t even need a sewing machine! Yep, this is a hot glue project, with a tiny bit of hand sewing. Keep reading for the step by step mason jar pin cushion instructions with all of photos you need to make this simple project.
This post may contain affiliate links, which means that while I am not paid to promote certain items, I will earn a small commission should you purchase items through these links. For more info, see my disclosure policy.
Free Mason Jar Pin Cushion Tutorial
These are super easy, free to make (if you already have jars lying around, that is) and don't even require any machine sewing!
Supplies:
Mason Jars with lids. I keep jars in several sizes around the house, but I buy the basic 16 oz. wide mouth jars by the dozen. I like to keep then on hand for when I’m invited to someone’s home and want to bring flowers! For my pin cushions here, though, I’m using the smaller 8 oz. jars, and this short fat jar, which makes a great large pin cushion.
A Scrap of Fabric
Some decorative trim
Glue gun
Needle and Thread
Stuffing
Step 1
The first step is to hot glue the flat lid piece into the lid rim. Don't burn yourself like I did! I got this glue gun from a thrift store, still in its 90's packaging and it gets waaaaay hotter than the newer glue guns. The thing is dangerous. I wonder if someone lobbied to get the temperature of glue guns regulated, hahahaha!
Step 2
Next, cut a circle from your fabric. I made my circle about 1.25 inches larger on all sides than my lid. For the small size lid, my circle measured 5 1/2 inches in diameter if that helps you, but it's not rocket science.
Step 3
Next, take your needle and thread, (thread your needle and knot the end together) and add long basting stitches all the way around the circle, about 1/4" from the raw edge. These long stitches allow you to gather the fabric up by pulling on the thread. Like so:
Step 4
When you get back around to where you started, don't knot or cut your thread, just leave the needle attached! Then pull up the gathering stitches until your pouf is about the size it needs to be to fit over your jar lid. Adjust the gathers so they're generally even all the way around.
Step 5
Begin hot gluing the fabric onto the lid, starting where the knotted end of your thread is and working around to where your needle is hanging. You want to leave that end loose until the end so you can pull the needle to adjust the fit as needed. Stop gluing once you have about a 2 inch space to fill with stuffing.
Step 6
Next, add the stuffing, small pieces at a time. You want to fill it pretty full so it's nice and firm!
Step 7
Once it's filled, pull on the end of your thread to make the gathers fit snug and then knot your thread and snip.
Step 8
Then, finish gluing the opening to the lid.
Almost done! All you have to do is glue your trim around to hide the thread and raw edges.
That's all! Screw the lid onto your jar, where you can store extra pins, quilting pins or other little sewing gadgets.
These super easy pin cushions have been very useful for me in my sewing room and for taking sewing projects on the road! I've made two, but think I'll need to make a couple more. I definitely think using the tiny jars would be super cute and would make great gifts to make for your sewing friends! If you make this tutorial, be sure and let me know, I'd love to see!
Cheers and happy sewing :)


